Mostrando las entradas con la etiqueta México. Mostrar todas las entradas

lunes, 6 de octubre de 2014

True Brit London: Review y Swatches

¡Hola! ¿Cómo están? ¡Espero que muy muy bien! Este post será enteramente en español porque es enoooorme. Recientemente (en México) llegó a Sally Beauty Supply la marca de esmaltes True Brit London, del Reino Unido, y por supuesto, tuve que añadir algunos a mi enorme pequeña colección. 
Ya en casa, me dediqué a probarlos, y vaya que los probé (usé todos!), así que aquí les van! Me parece que son casi todos los tonos disponibles en Sally, así que espero que les sea útil este post para sus próximas compras!

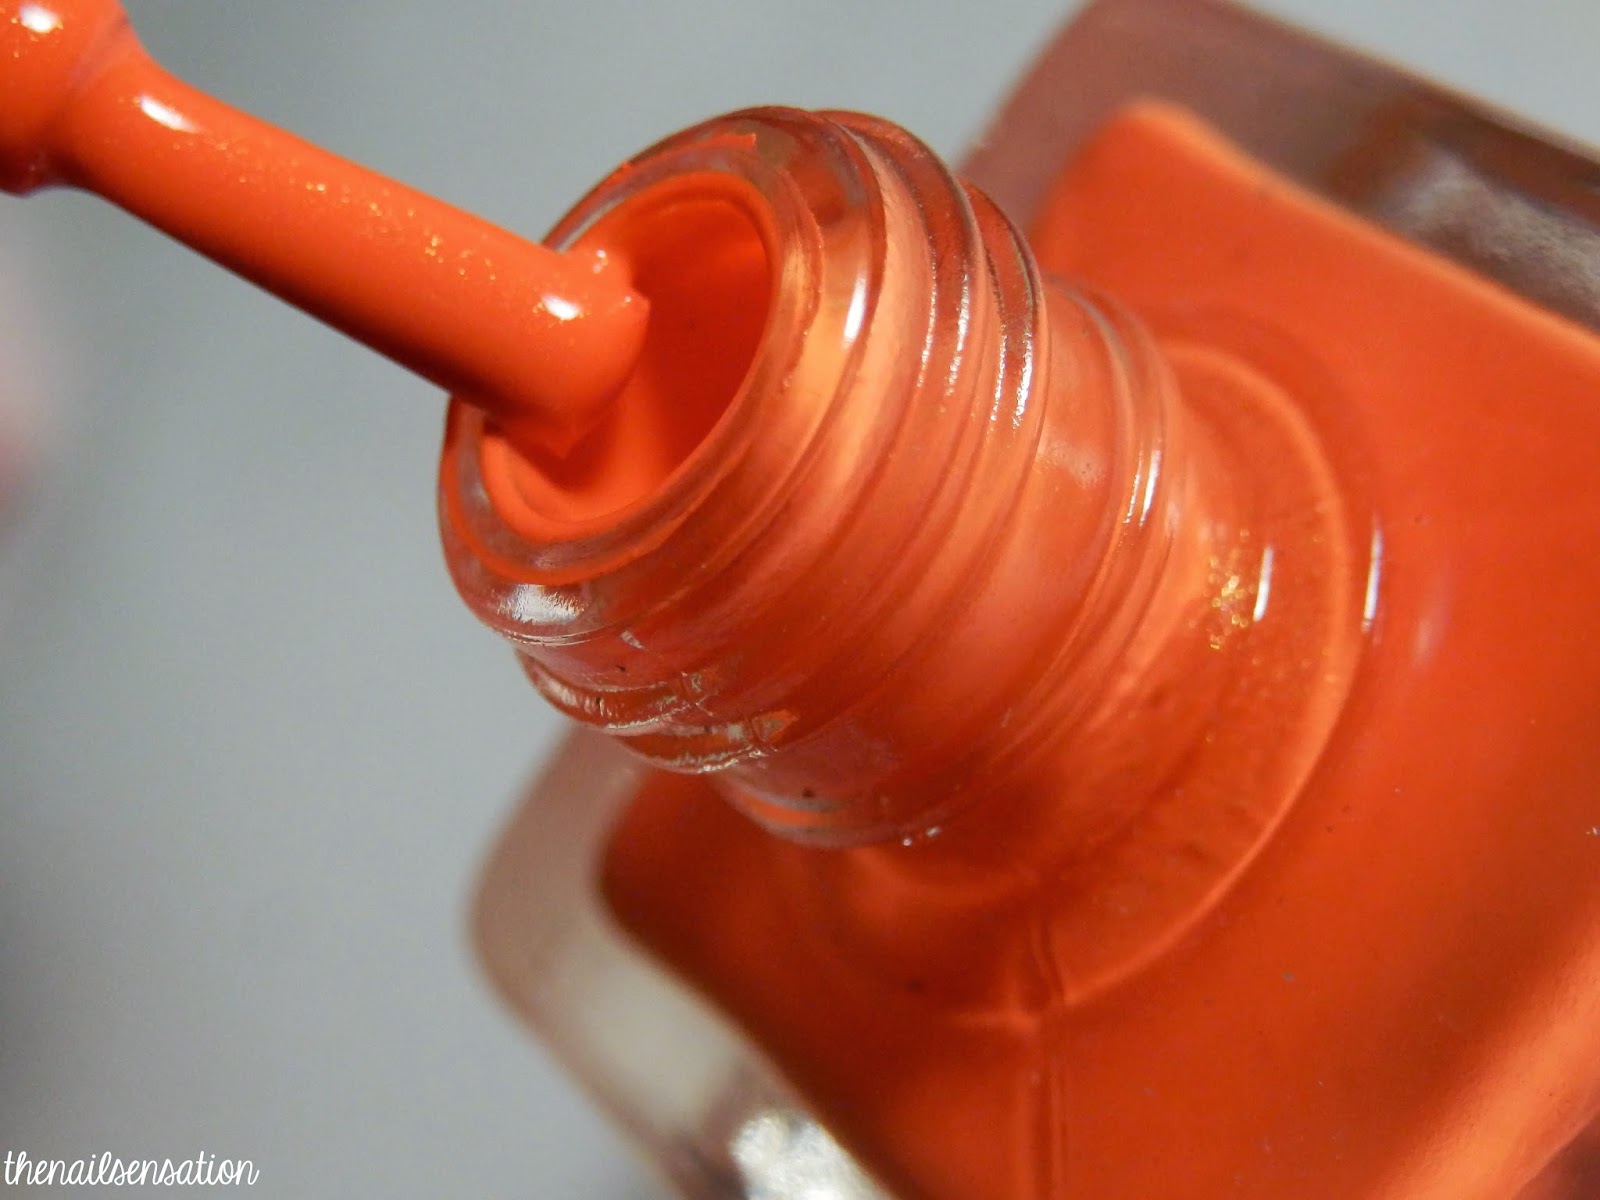
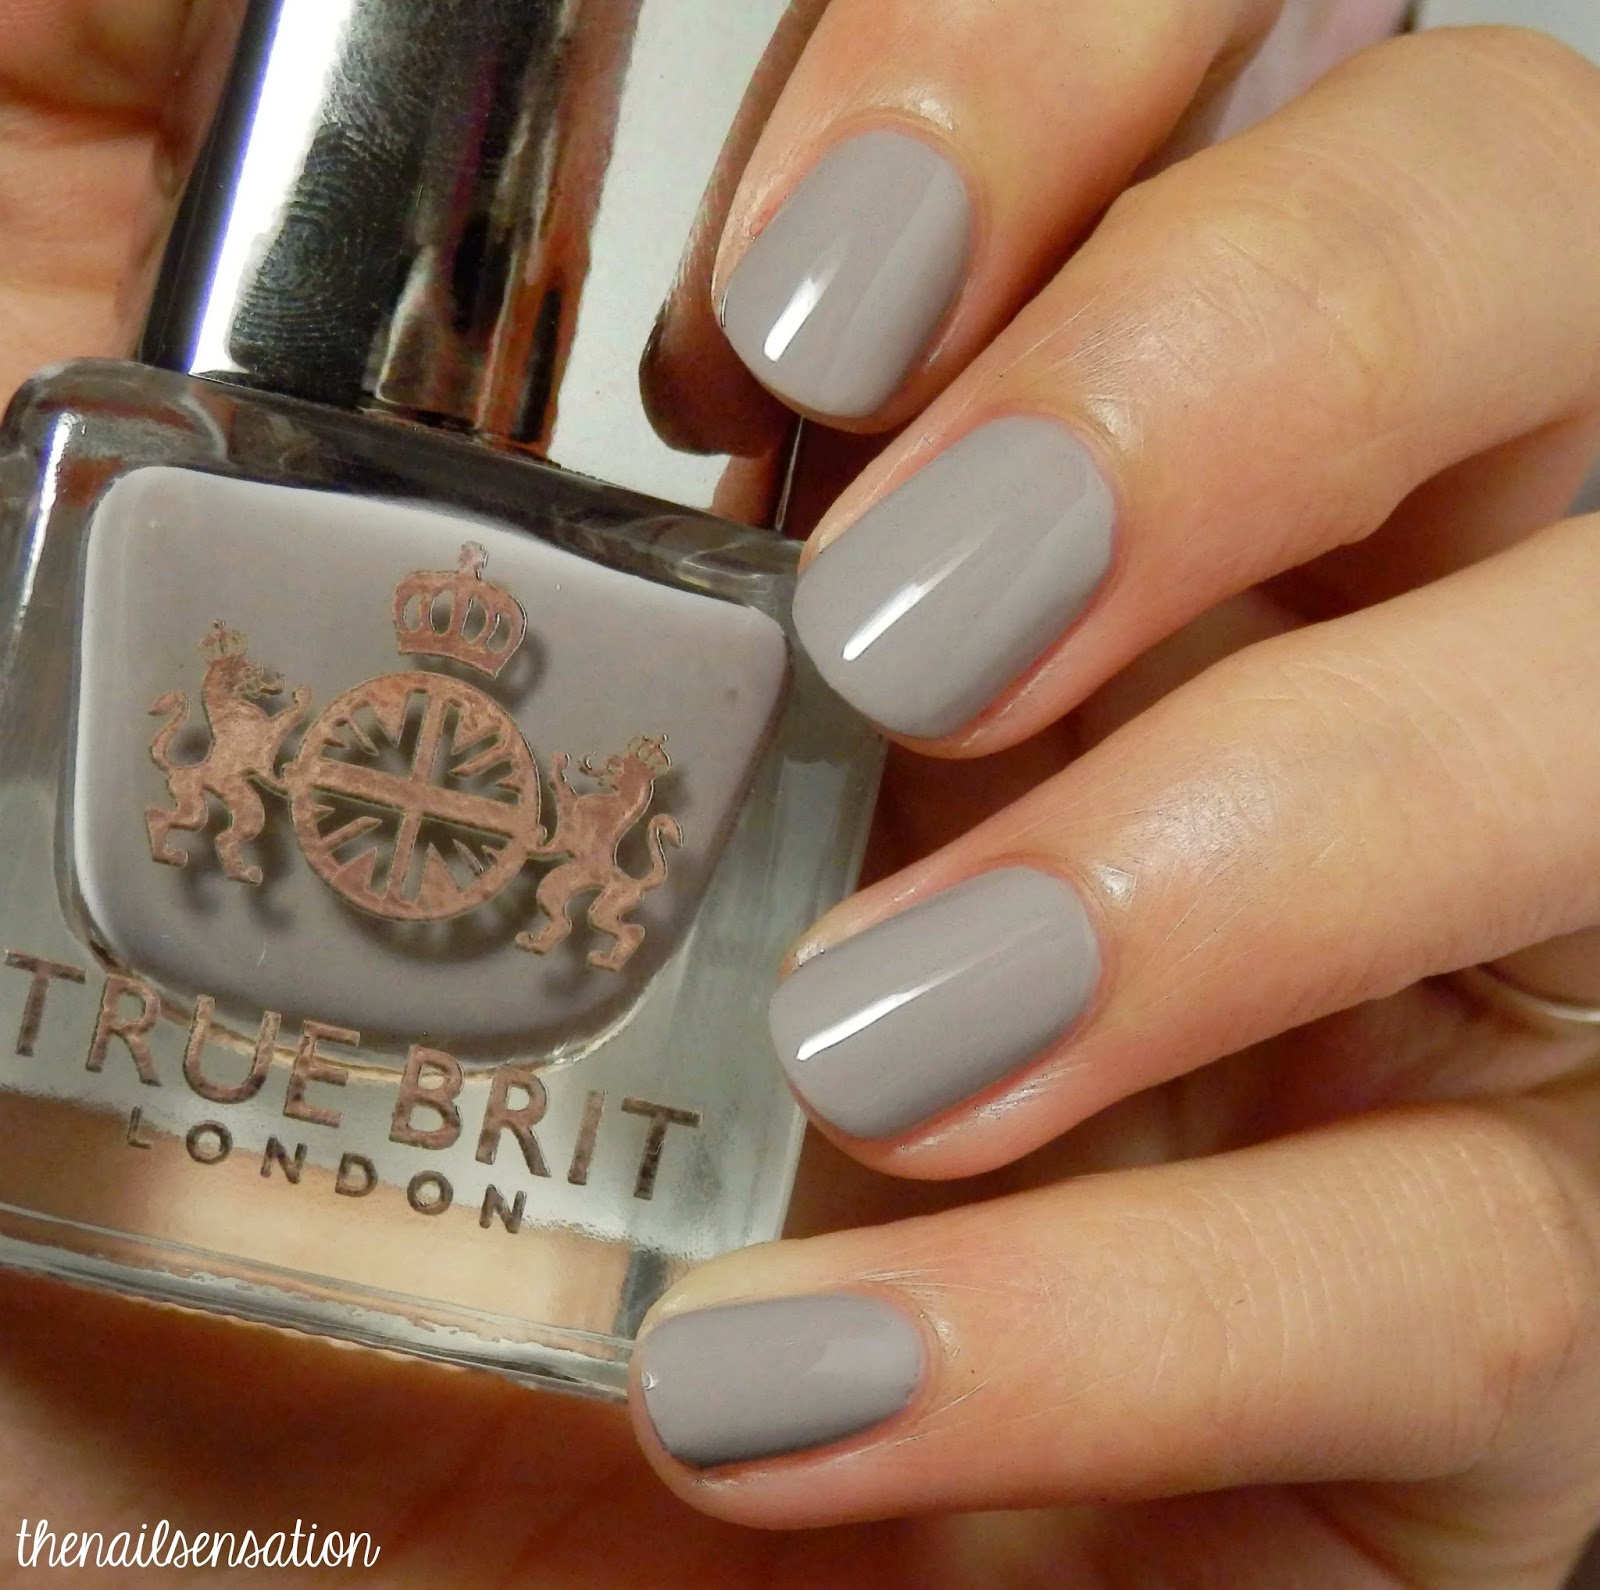
Empecemos con la botella. La verdad... me encanta! Debo confesar que me atraen mucho las envolturas diferentes y bonitas, y la botella cuadrada con detalles cromados me encantó. La tapa se puede retirar para pintar con más facilidad. Tiene una capacidad de 10 mililitros, aunque la botella es grande.

True Brit London
True Brit London
True Brit London

La brocha también me gusto. es bastante ancha y permite una aplicación casi perfecta pues no tuve que limpiar en cada swatch. 


En general, la fórmula es buena, no es ni muy espesa ni muy aguada (al menos en la mayoría de los tonos), tienen buena opacidad y no huelen mal. De hecho, la formula es 6-Free. Son veganos, no tienen tolueno ni formaldehído ni DBP, tampoco testan en animales y no contienen resinas. 
Ahora si, pasemos a los swatches! Intentaré ser breve para que este post no se haga mas largo de lo que ya es, jajaja. Ah! y para ninguna foto usé top coat :)


Heritage
HERITAGE es un tono blanco aperlado, uno de mis favoritos! Necesita 3 capas para estar totalmente ópaco, sin embargo la fórmula permite aplicar varias capas sin verse abultado. 


Victoria
VICTORIA tomó cuatro capas para alcanzar la opacidad en la foto, y aun se vé un poco de la línea de la uña en el anular, sin embargo... me encanta! Es un color nude/rosado blanquizco divino, y a mi me gusta mucho como se ven este tipo de esmaltes.


Cream team
 CREAM TEAM es rosa bebé. Tres capas. Es un poquitín mas rosa en vivo.


The ritz
THE RITZ es lila pastel. Muy bonito, opaco en 3 capas. 


Royal ascot
ROYAL ASCOT es baby blue con shimmer plateado. Necesito 4 capas pero quedó perfectamente opaco. Es muy semejante a Blue Lagoon de Revlon, pero no son iguales. 


Minted
MINTED es el hermanito de Royal Ascot, pero en verde pastel. También tiene shimmer plateado aunque en ambos casos fue difícil de fotografiar. 


Bow bells
BOW BELLS es un coral precioso. Está un poco deslavado en la foto, es de esos tonos que vuelven loca a la cámara. Queda opaco en 3 capas. Pensé que tendría algun color similar en mi colección, pero se trata de un coral bastante único. 


Dressage
DRESSAGE es el palo de rosa perfecto. Opaco en solo dos capas. 


Ladies day
LADIES DAY también vuelve loca a la cámara. Se trata de un rosa barbie, es un poco mas saturado en vivo. Tres capas. 


Brighton rock
BRIGHTON ROCK, también de mis favoritos! Es un rosa mexicano súper intenso, muy pigmentado, sólo tomó dos capas en quedar perfectamente opáco. 


English rose
ENGLISH ROSE es de esos colores que estan entre rosa y rojo. Es un tono muy bello y también queda opáco en dos capas. 


Fire of london
FIRE OF LONDON es súper intenso! Este color naranja rojizo a pesar de estar bastante pigmentado, logra un efecto jelly. Muy bonito y solo tomó dos capas para obtener el acabado de la foto. 


Rule Britannia
RULE BRITANNIA es rojo sangre! Tiene un subtono naranja, perfecto en 3 capas. 


HRH
HRH, me gusta mucho el tono de vino, sin embargo despues de 3 capas aún me quedaban pedacitos mas opacos que otros; es un poco más difícil nivelar el esmalte.


Golly gosh
GOLLY GOSH es completamente jelly. Para la foto usé 4 capas generosas, y aún se ve un poquito de la línea de la uña. Pero a mi me gustan mucho los esmaltes con este acabado y GG no fue la excepción!


Heirloom
HEIRLOOM me gustó desde que vi la botella. Se trata de un dorado cobrizo metálico, con pequeñas partículas plateadas. Además este también quedo opáco en dos capas. No tengo nada semejante en mi colección. 


Silver service
SILVER SERVICE es plata metálico. Opaco en 3 capas. 


Duchess
DUCHESS es muy semejante a Chinchilly de Essie (pero no igual D: ). Es un suave tono de gris, opaco en 3 capas.


British blue
BRITISH BLUE es lo que yo consideraría como azul periwinkle. De hecho, es muy parecido a Secret Periwinkle de China Glaze. De nuevo, parecidos pero no iguales; BB es ligeramente más oscuro. Dos capas. 


Soho
SOHO vuelve loca a la cámara, también. No es azul, es morado, lo juro! Y no tengo nada con que compararlo :c. De todas las fotos que le hice esta fue la mas cercana a la realidad. 3 capas. 


Alfie
ALFIE es precioso! Este verde brillante alcanza cobertura total en 3/4 capas, pero vale la pena el esfuerzo. Es un color bellísimo!


Stiff upper lip
STIFF UPPER LIP es el último color que tengo para mostrárles, y lo dejé para el final porque es mi favorito!!!! Este hermosisimo e intenso naranja es muy cubriente, solo necesitó dos capas. Tiene shimmer dorado muy visible en las uñas, pero en la cantidad exacta para seguir siendo naranja y no dorado. ¡Es perfecto! Y más para el otoño ;). 


Hasta aquí los swatches! Espero que les hayan gustado y ojalá les sean de utilidad. True Brit sólo esta de venta en Sally Beauty Supply y tienen un costo de $68 cada uno. Gracias por la visita y nos vemos en el próximo post! Besitos!

Pam

domingo, 11 de agosto de 2013

Bestie twin mani!

Hi everyone! Hope you all had a great weekend! 
For this post I want to talk about something very special and new for many of you. As you'll probably know if you had follow me for a while, im very, very active on Instagram. In fact, I consider my blog as an extension of my Instagram and not otherwise. I've met amazing people thanks to that app and I have so much fun in there.. for those of you who dont know much about it, there's an entire nail art community on Instagram, and this gives you the chance to make friends with the same interest, which as I have said before, its just amazing. I love my friends! I want to talk about all of them, but today I'll tell you about my fellow mexican blogger friend, Mari from Nailista.
Now, as the title says, I want to talk to you about a bestie twin mani that I did with her. Keep reading to learn more about it!

Hola a todos! Espero hayan tenido un fin de semana excelente!
Para este post les quiero hablar de algo muy especial y nuevo para muchos de ustedes. Como probablemente sabrán si me han seguido desde hace un tiempo, soy muy, muy activa en Instagram. De hecho, considero mi blog como una extensión de mi cuenta de Instagram y no al revés. He conocido gente maravillosa gracias a esa app y me divierto muchísimo ahí... para aquellos que no sepan mucho sobre ello, hay una comunidad entera ahí de chicas como yo que disfrutan el nail art y publican en Instagram, y eso te da la oportunidad de hacer nuevos amigos con los mismos intereses, que, como ya dije antes, es maravilloso. Amo a mis amigos! Quiero hablarles de todos ellos, pero hoy les contaré de mi amiga blogger mexicana Mari de Nailista.
Ahora, como el título dice, les quiero hablar del bestie twin mani que hice con ella. Sigan leyendo para saber mas sobre esto!

Let me tell you a bit about what's a bestie twin mani. Its, as the name suggest, a twin mani between two or more peoplee, meaning that the manicures will have the same colors/details or will be exactly the same, this will be decided by the ones involved. This fantastic activity was created by the talented @mrslochness and her awesome bestie @veebutterfly (on IG)  as a way to bond since they live in different states. It is truly a great way to bond with friends who live far from you and it is also a fun and creative thing to do.. which leads me to Mari!

Déjenme les cuento un poco de qué es un bestie twin mani. Es, como el nombre sugiere, un manicure gemelo entre dos o mas personas, es decir que los manis tendrán los mismos colores, caractéristicas, o incluso serán exactamente iguales, todo depende de que decidan los participantes. Esta fantástica actividad fue creada por la talentosa @mrslochness y su maravillosa amiga @veebutterfly (en IG) como una manera de unirse,  ya que viven en estados diferentes. De verdad es una forma genial de unirse con amigos que viven lejos de ti y además es algo divertido y creativo para hacer.. lo que me lleva a Mari!


A few months ago, back when I started blogging,I came across with nailistayco.blogspot.com and I fell in love with the manis I saw in there. I just thought she was so talented! I left her a comment and then she left me a comment and it was like that until we started writing emails and so, until 2 months ago, I had the pleasure and honor to meet Mari and her cute family in real life. I was like o-m-g she is so pretty!!! hahaha! But not only she was pretty in the outside but also inside. And of course, i mean, of cooouurse I had to suggest that she should join Instagram, and that we obviously had to do a bestie twin mani! Finally, a few weeks ago, she joined Instagram and I got sooo happy! We decided our twin mani should be almost identical, and Mari showed a pic to me of an outfit that Kim Kardashian wore, as inspiration. Then, she designed the index and middle fingers and I did the ring and pinky. And then we posted on Instagram in a cute collage Mari did! Obviously, a blog post was necessary, but I kept forgeting haha. 

Hace algunos meses, cuando empecé a bloguear, me topé con nailistayco.blogspot.com y me enamoré de los manis que vi ahí. Solo pensé que era muy talentosa! Le dejé un comentario a Mari, y luego ella me dejó un comentario y así fue hasta que empezamos a escribirnos mails y asi y asi, hasta hace 2 meses, que tuve el placer y honor de conocer a mari y su linda familia en la vida real. Y yo así de o-m-g que bonita es Mari! jajaja! Pero no solo era bonita por fuera sino también por dentro. Y claro, digo, claaaro que tenía que sugerir que se uniera a Instagram, y que ooooobviamente teniamos que hacer un bestie twin mani! Decidimos que nuestro twin mani debía ser idéntico, y Mari me enseñó una foto de un outfit de Kim Kardashian como inspiración. Luego, ella diseñó el índice y el medio, y yo el anular y meñique. Y luego lo publicamos en Instagram en un bonito collage que Mari hizo! Obviamente, un blog post era necesario, pero se me seguía olvidando jaja.


Collage
my mani

Mari's mani
I am very happy to have met Mari, she is a wonderful person! And her blog is really warm and interesting. Please, check her out! Also, check her IG account, @nailistayco! Mine is @pamelapomelo.
Doing this type of activities is so much fun! I really suggest you try this at least once with a friend or a group of friends. You're going to enjoy it! I hope that you like this post and our manis, and reading this close-to-my-heart type of post haha :'). I'll keep writing about all the collabs i've done and the amazing friends i've met. Thank you for reading!!! Lots of kisses!

Estoy muy feliz de haber conocido a Mari, es una gran persona! Y su blog es muy cálido e interesante. Por favor, visitenlo! También, chequen su cuenta de instagram, @nailistayco! La mía es @pamelapomelo.
Hacer este tipo de actividades es muy divertido! Yo sugieron que lo hagan al menos una vez con una amiga o un grupo de amigas, realmente lo van a disfrutar! Espero que les haya gustado este post y nuestros manis, y leer este tipo de post cercano-a-mi-corazón jaja :').Seguiré escribiendo sobre las colaboraciones que he hecho y los maravillosos amigos que he conocido. Gracias por leer!! Muchos besos!

sábado, 16 de febrero de 2013

Essence Blue addicted

Last post for today. Here is Essence's Blue addicted. Oh my. I love this one. Let me tell you, when I bought this (Essence just arrived to Mexico) I wasnt this much into nail polish so I just chose it like any other one. Then a few months ago I realized what I had in my hands. A beautiful blue jelly packed with blue, green and silver glitter. A dupe for Deborah Lippman's Across the universe
Sadly, it seems this was discontinued after the bottle switch. (sad face).
I'll leave you with the pics. Shown, one coat over Essie's Aruba blue. Thank you for reading!

El último post por hoy. Este es Blue addicted de Essence. Oh.. lo amo. Dejenme les cuento que cuando lo compré (Essence acababa de llegar a México) no estaba muy metida en eso de los esmaltes asi que solo lo agarre como hubiera agarrado cualquier otro. Hace un par de meses me di cuenta de lo que tenia. Un jelly precioso con glitter plata, azul y verde. Un dupe para Across the universe de Deborah Lippman. Desafortunadamente parece ser que este tono fue descontinuado después del cambio de botella. Lo he estado buscando para tener un backup pero sin suerte. Agradeceré cualquier información de donde lo puedo encontrar. (Vivo en México).
Los dejo con las fotos. Es una capa de Blue addicted sobre Aruba blue de Essie. Gracias por leer!


martes, 18 de diciembre de 2012

OPI: The man with the golden gun

 Ever since I knew I was gonna be able to get The man with the golden gun, I created a design in my mind for it. That was the first days of October, and now I was able to place that exact design on my nails. But let me tell you, if you didnt hear about TMWTGG, i'll tell you what its all about. TMWTGG is part of de OPI collection, Skyfall. Its a way to celebrate 50 years of 007. It comes in a special box, in a golden bottle. Its a top coat, a clear base with tiny real 18k gold leaf. Take a look at the pics so you see how special it is!

Desde que supe que iba a tener The man with the golden gun, imaginé un diseño en mi mente. Eso fue los primeros dias de Octubre, y ahora pude hacer ese mismo diseño en mis uñas. Pero dejame te digo, si no escuchaste de TMWTGG, te diré de que se trata.
TMWTGG es parte de la colección Skyfall de OPI. Es una forma de celebrar 50 años del 007. Viene en una capa especial, en una botella dorada. Es una top coat, una base transparente con pequeños pedazos de oro de 18 kilates. Mira las fotos, para que veas cuan especial es.


Now i'll just share some pics of my mani. Let me say, i loved the outcome! exactly as I planned. Base colors are Spontaneous and Blue Iguana, both from China Glaze. Thank you for reading, and enjoy!

Ahora comparto unas fotos de mi diseño. Amé como salió, exactamente como yo lo planee! Los colores de base son Spontaneous y Blue Iguana, ambos de China Glaze. Gracias por leer, y disfruta!


Que donde lo consegui? Pues en Beauty Corner, claro. Info del lado derecho del blog.

lunes, 17 de diciembre de 2012

China Glaze Cirque du soleil: Worlds away 2012

Urrgh! Sally Beauty Supply I hate you! They had only a few bottles of each shade and they dont restock. Please tell me how is that freakin' possible! Anyways, I was able to grab at least three babies (I lost Its a trap-eze though ;_;) and here I have some pics for your delight.

Ughh!!! Sally Beauty Supply, te odio! Solo tenian algunas botellas de cada color y no resurten. Por favor que alguien me diga como eso es posible! Pero bueno, pude traer a casa 3 bebés (aunque me perdí de It's a trap-eze ;_;) y aqui traigo algunas fotos para deleitarse.


 Running in circles is a intense, 'plant' green jelly base fully packed with green micro glitter. Amazing! I love it so much! 

Running in circles es una base jelly verde intenso, (verde planta diria yo) cargadísima de micro glitter verde. Increible! Lo amo!


Water you waiting for. Its gorgeous. A blue jelly base, blue micro glitter, green small glitter, purple small glitter. It made me drool. 

Water you waiting for. Una base jelly azul, micro glitter azul, glitter pequeño morado y verde. Me hizo babear.


Last but not least, Whirled away. This reminds me of some indie brands. Let me say that even with the fact that application its not easy, cause you have to fish the white hex, this is so special and its on my list of all-time fave polishes. Slightly tinted base (I assume its glitter bleeding), white large hex, medium black hex, black bars. Gorgeous. Gorgeous. 

Último pero no menos importante, Whirled away. Me recuerda a algunas marcas indie. Aun cuando la aplicación no es sencilla pues hay que pezcar los glitters blancos, este esmalte es muy especial y ya está en mi lista de favoritos. Base ligeramente tintada (supongo que es un poco del glitter que pinto la base), hexagonos grandes blancos, negros medianos, y barras negras. Precioso. Precioso.

Shown over / Mostrado sobre: CG White on withe, Dior 219, CG Sea spray, CG Liquid leather, CG pink voltage, CG Happy Go Lucky, OPI Fly, CG Spontaneous.


Thank you for reading! / Gracias por leer!

OPI Skyfall Nail Apps

 Hi everyone! Days ago I got this awesome OPI nail apps, so I thought I share a little tutorial on how to put them on and some random thoughts.
OPI Pure Lacquer Nail Apps are pre-cut strips made 100% of nail polish. This envelope contains 16 stripes in different sizes to fit most nail sizes. There are 4 designs but here im showing 'Nice Tux HDL32'. Its a silver scattered holo glitter base with random black glitter zigzags. I loved this design cause its so sparkly! These nail apps are about 12.5 dollars.  
These strips have base coat- color coat- top coat meaning you dont need base nor top coat. 
BTW if you are too lazy to look every single pic juts go to the end of the post where I did a condensed tutorial :D

Hola! Hace unos dias fui a mi tienda preferida Beauty corner, y traje a casa estas increibles Nail Apps de OPI, asi que hice un pequeño tutorial sobre como ponerlas.
OPI Pure lacquer Nail Apps son tiras precortadas hechas 100% de esmalte de uñas. Este empaque contiene 16 tiras en diferentes tamaños para quedar bien en casi todos los tipos de uñas. Hay 4 diseños pero aqui les enseño 'Nice Tux HDL32'. Es una base de glitter plateado holografico con zigzags de glitter negro. Me encantó este diseño porque brilla muchisimo! Estas Nail apps cuestan 165 pesos en Beauty Corner.
Las tiras vienen asi: Base + Color/Diseño + Top coat. Osea que no necesitas ponerte nada ni antes, ni después.
Por cierto! Si te da flojera ver todas las fotos, puedes ir al final del post, donde puse un condensado del tutorial :D


 First of all, you have to find the right size for each nail. Do as shown in the pic. But choose wisely cause it might be too short for your nail.Its not a big deal if its too big though.

Primero, encuentra la tira adecuada para tu uña, asi como en la foto. Pero escoje bien pues si no te puede quedar muy chica. No hay tanto problema si te queda un poco grande.


Remove the top clear film, using the blue tab. Next, peel strip. From now on, try to be fast. As the strips are made 100% polish, they dry in no time and they its harder to stick them on the nail.

Quita el protector transparente con ayuda de la pestaña azul. Después, quita la tira de esmalte. A partir de ahorita, intenta ser un poco rápida. Como las tiras están hechas 100% de esmalte, se secan rapidamente y es mas difícil pegarlas en las uñas.


Stick the strip on your nail. Press firmely and smooth the surface.

Pon la tira en tu uña. Presiona firmemente y suaviza la superficie.


 Last step: file the excess downwards and smooth the edges. You're done!

Último paso: lima el exceso hacia abajo y empareja los bordes. Ya acabaste!


Final result/Resultado final:


 Best thing: Guess how much time it took me to put these babies on? No more than 5 minutes (I have a witness lol). I was able to have em on for 2 days, I only took them off cause I hardly can stand 2 days without painting my nails! I wore them for a dinner so they were perfect and I got a lot of compliments. 
Another perk: You don't have to wait til your nails are dry. This is awesome for people who dont have much patience. I loved that they look real and not fake as those cheap ugly stamps at the mall, urgh hate them.  Aaaaaand as a last comment these are actually cheaper than Sally Hansen's! (at least here in Mexico). I also made some pics on the taking-off part:

Lo mejor: Adivina cuanto tiempo me tomó ponerlas en las 10 uñas? No más de 5 minutos (y tengo un testigo jaja). Las pude tener 2 dias, solo me las quité porque con trabajos resisto 2 dias sin pintarme las uñas! Las usé para una cena asi que estuvieron perfectas y recibí muchos halagos!
Otra ventaja: no tienes que esperar a que tus uñas sequen. Esto esta excelente para gente que no tiene mucha paciencia. Me encantó que se ven muy reales y no falsas como esas estampas chafas que venden en el centro comercial ugggh las odio. Yyyyyyy como último comentario estas son mas baratas incluso que las de Sally Hansen! (al menos aqui en México, DF). También tome algunas fotos de cuando las quité:


Yep thats a cotton ball. As I said before these are 100% polish so I took them off with pure acetone. First the black came off, then the silver glitter. just as taking a real handmade design off. 

Si, se quitan con algodón y acetona! Como dije antes son 100% esmalte asi que las quite con acetona pura. Primero se cayó el negro y luego el glitter plateado, exactamente igual a quitar un diseño hecho a mano. 

Now, the condensed tutorial. 
Ahora, el tutorial condensado.


1. Choose the right size for your nail. 2. Take the clear film off. 3. Peel strip. 4. Apply on the nail. 5. Press on the sides. 6. Smooth the surface. 7. File off excess downwards. 8. Smooth the edges. Done!

1. Escoge el tamaño adecuado para tu uña. 2. Retira el protector transparente. 3. Despega la tira de esmalte del papel. 4. Pega en tu uña limpia. 5. Presiona los lados. 6. Empareja la superficie. 7. Lima el exceso hacia abajo. 8. Empareja los bordes. Listo!


Its a long, long post, im sorry! But I hope it helps in case you want to try them out. Thanks for reading!

Es un post largo, perdón! Pero espero que te sea útil en caso de que quieras probarlas. Gracias por leer!
*DE VENTA EN BEAUTY CORNER
Related Posts Plugin for WordPress, Blogger...